 Membership Inquiry – How to Create a Member
-When you need to distribute the app to all students of the school with an app created by the school: Create an account uniformly by student number or class number
-When using within the company: Create an account with serial number and employee number
-If multiple users need to use it as a test before official distribution of the app (log in with a batch created account without signing up one by one)
-Otherwise, it can be used when you need to create a specific ID at the discretion of the administrator.
1.
2.
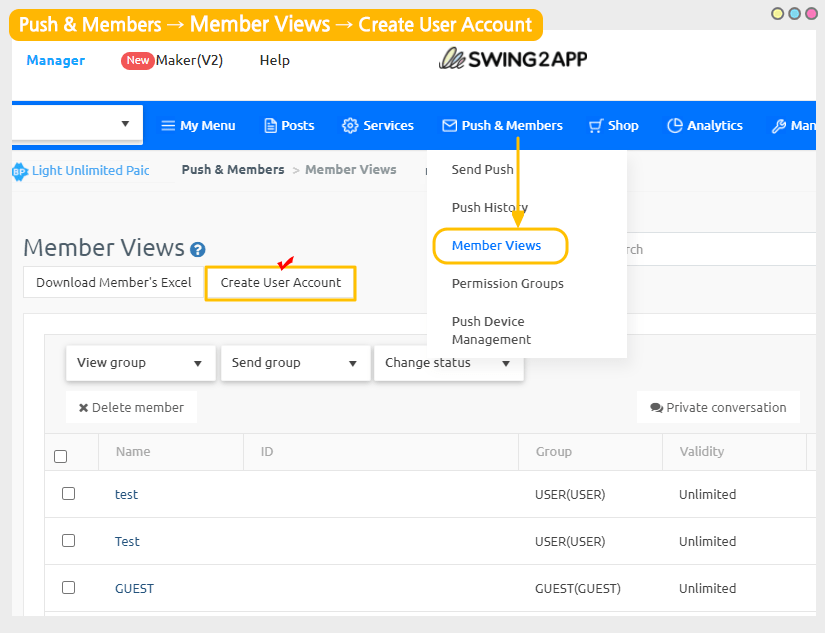
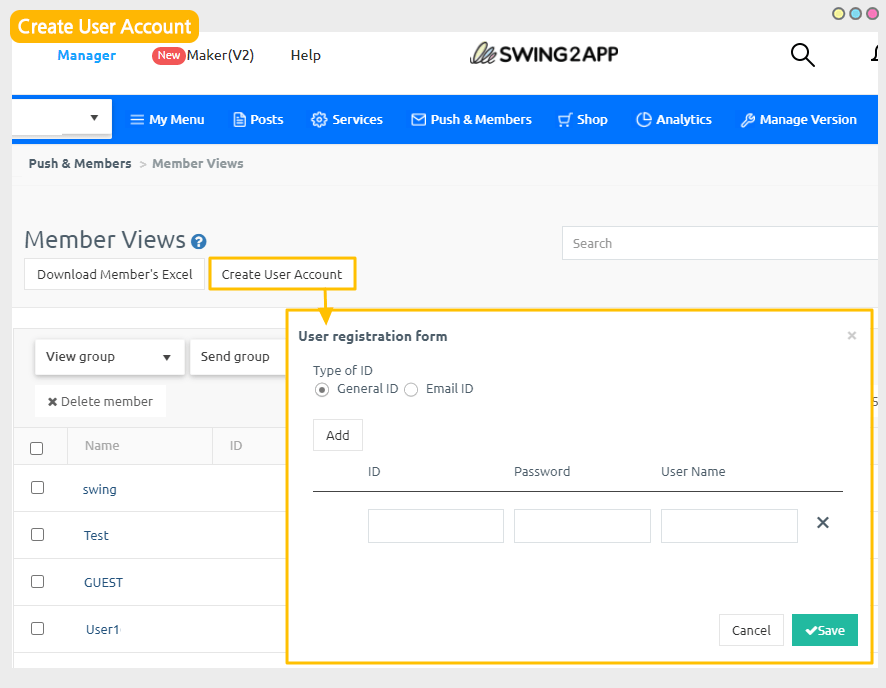
If you tap the [Create Member] button, the member creation pop-up window opens.
3.
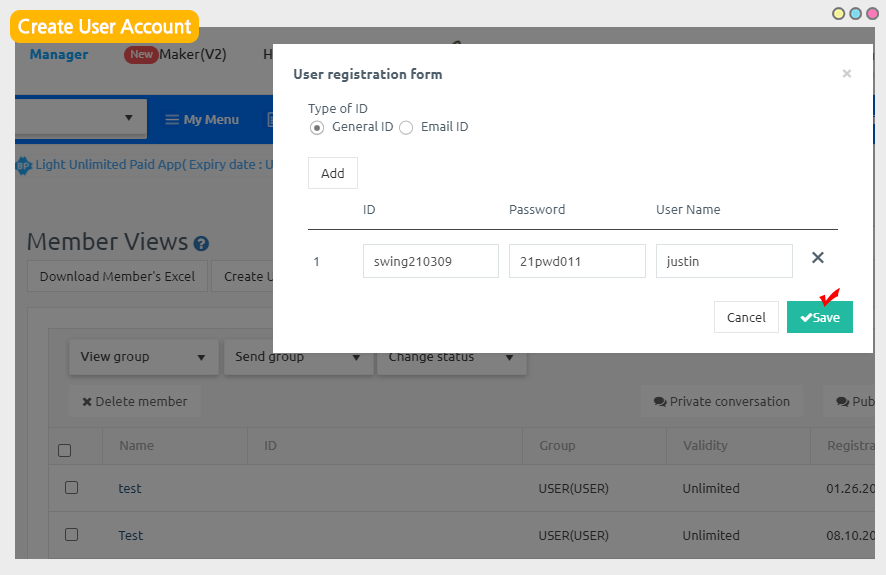
After selecting the ID type, enter the ID, password, and name, and click the [Save] button to complete.
If you add more IDs, click the [Add] button to continue creating them. You can add an ID without any restrictions!
*The ID type can be specified by general ID (including English and number) or email.
→ Administrators must individually inform users of the account created in this way to users who want to use the app.
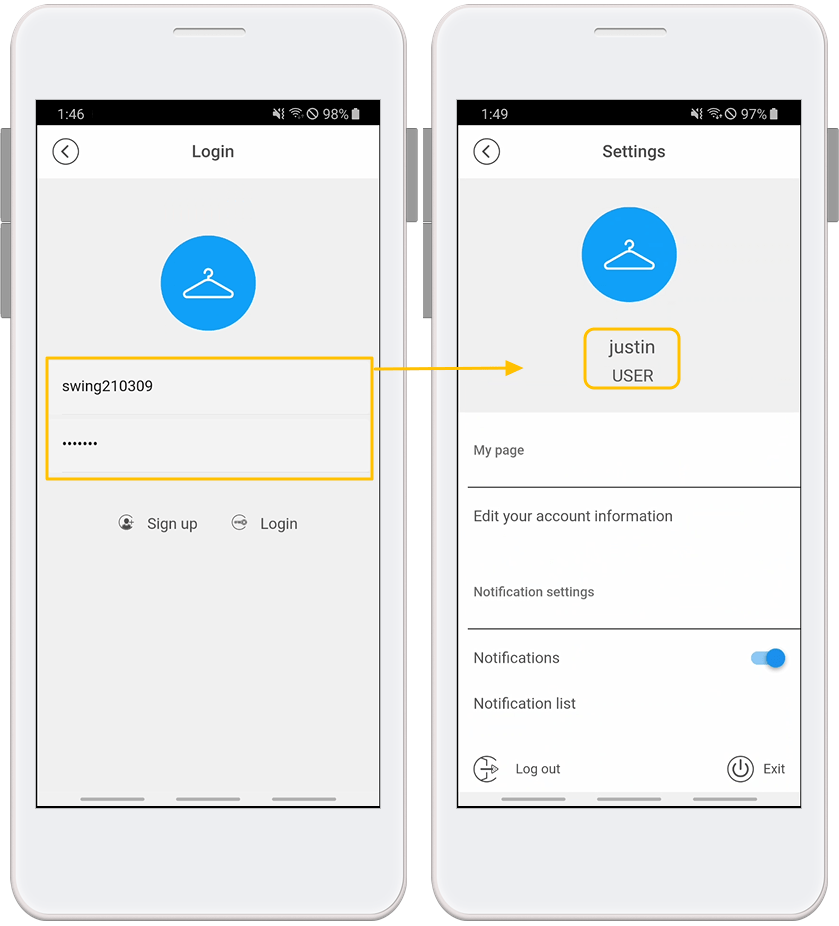
Users can log in from the app with the account (ID, password) received from the administrator.
4. Log in with the created account) App execution screen

Users do not need to sign up for a separate membership in the app, and can easily use the app by logging in with the account received from the administrator.
Users who received an account by creating a member can also change information such as profile image and password by editing member information.


