Swing2App Maker(V2) Page – We’ll show you how to create an app in 3 steps: App Basics, Design Themes, and Page Menus and how to produce and install it on your phone.
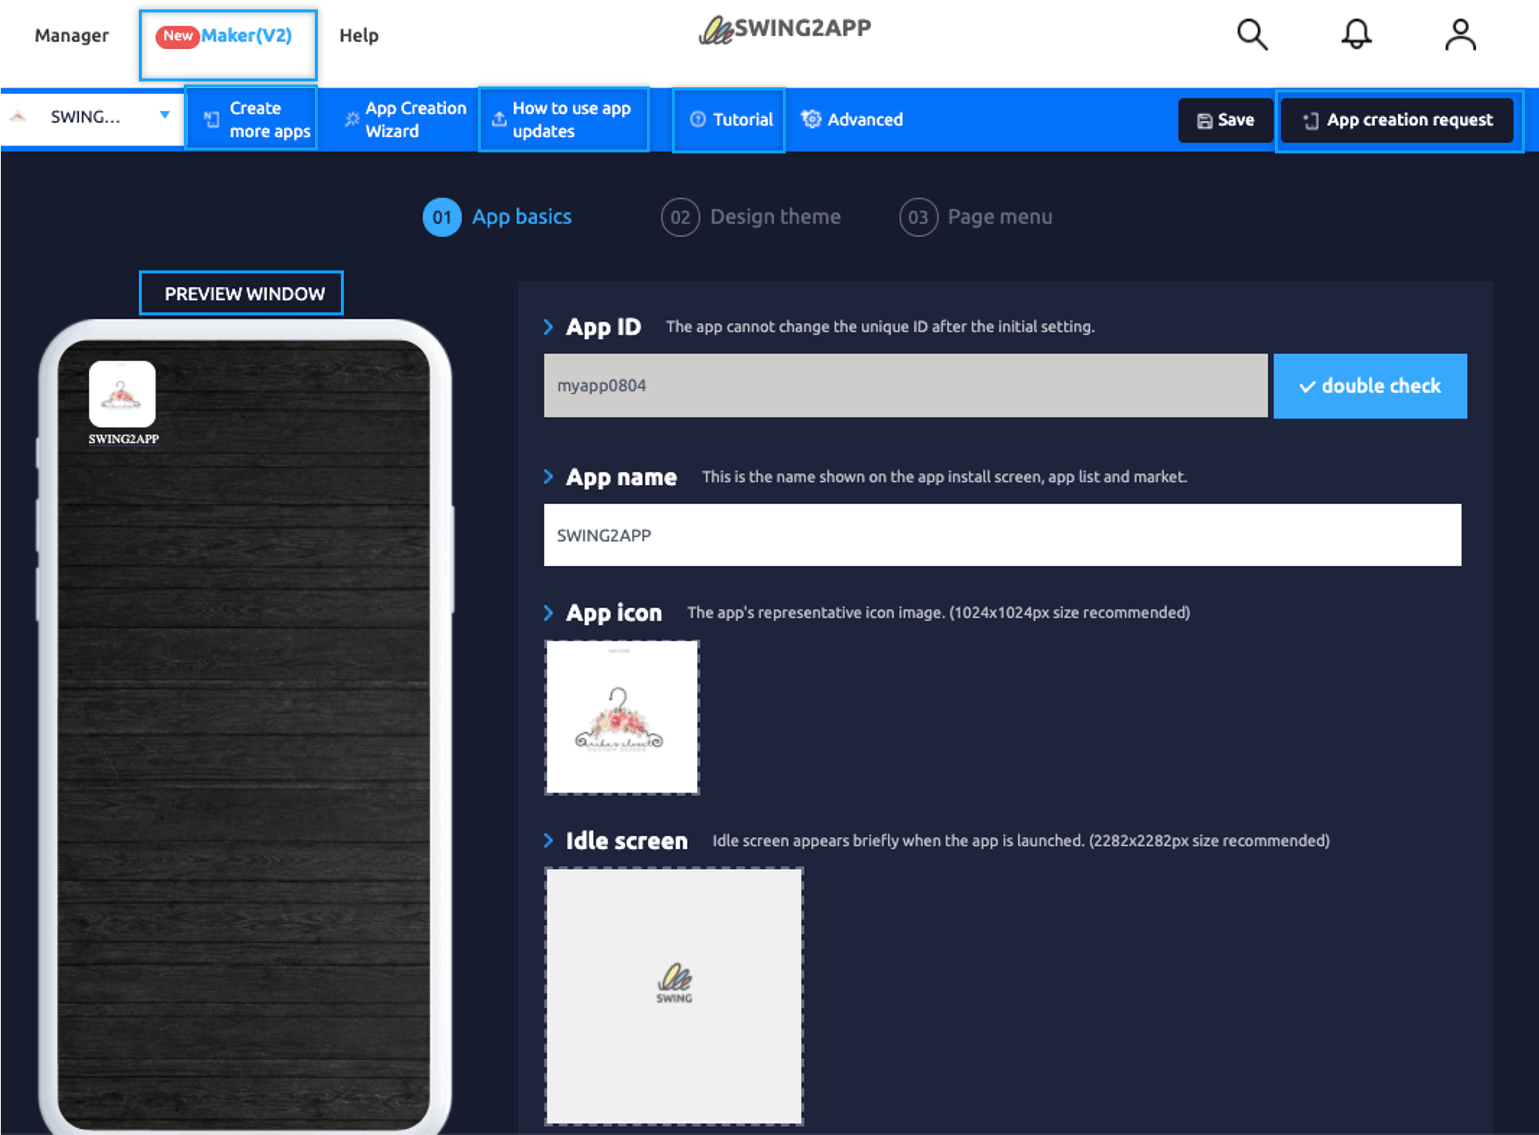
App creation takes place in “Maker(V2)”
1. Create more app: If you want to create more than 1 app, press this button.

2. How to use updates: It will direct you to the page where you can read instructions related to app updates after app production.

3. Tutorial: Here you can check basic guidelines for app production

4. Preview window: You can preview your app in real-time
5. App creation request: After the app creation process is done(App basics, Design theme, Page menu), click on the App creation request button to complete the app production process.
STEP 1. App Basic
Here you can set App ID, App name, App icon, and Idle screen for your app.
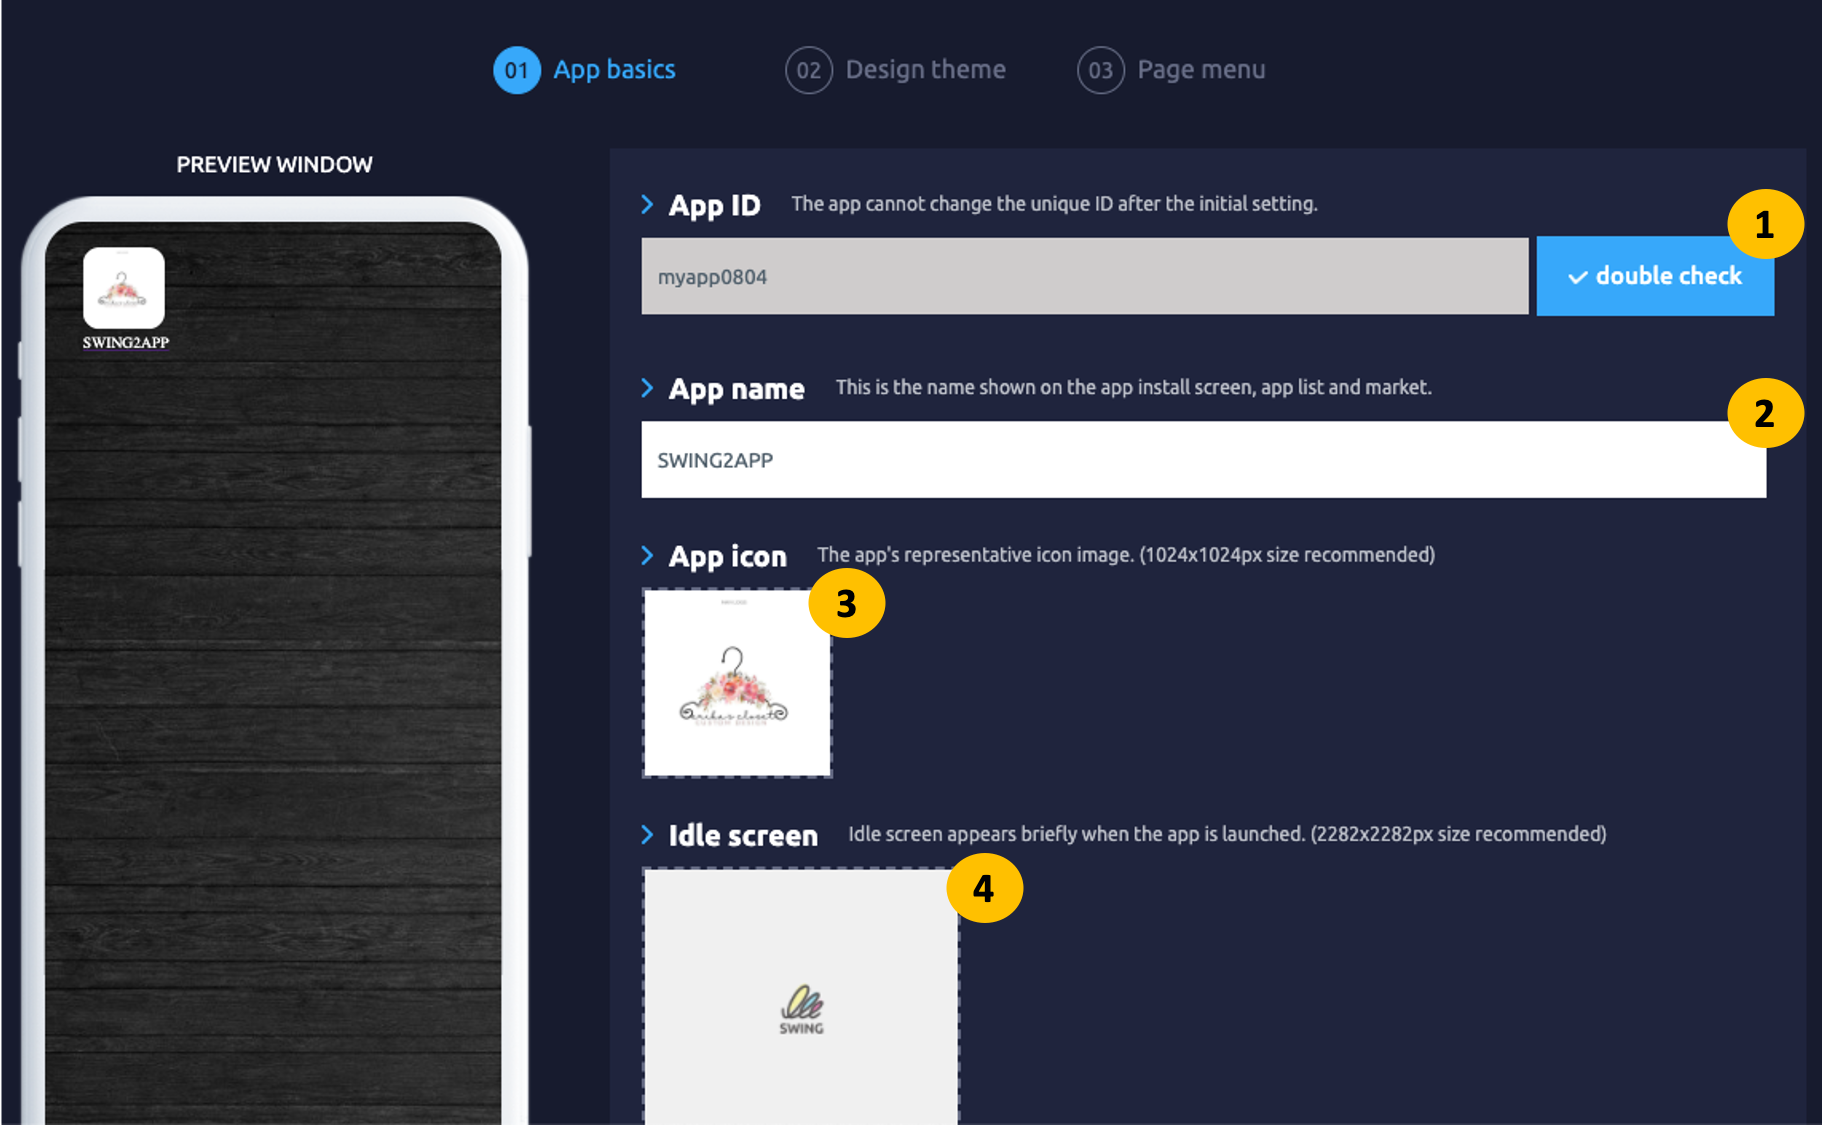
For Detailed Guide on App Basics Visit: [Go to Detailed Tutorial]
*NOTE
1. Swing2App provides a built-in image editing tool so you can edit the image (icon & idle screen) anytime.
STEP 2. Design Theme
Here you can select Design (Prototype) and Theme (skin, detailed color setting, main design & app navigation style) of your app.
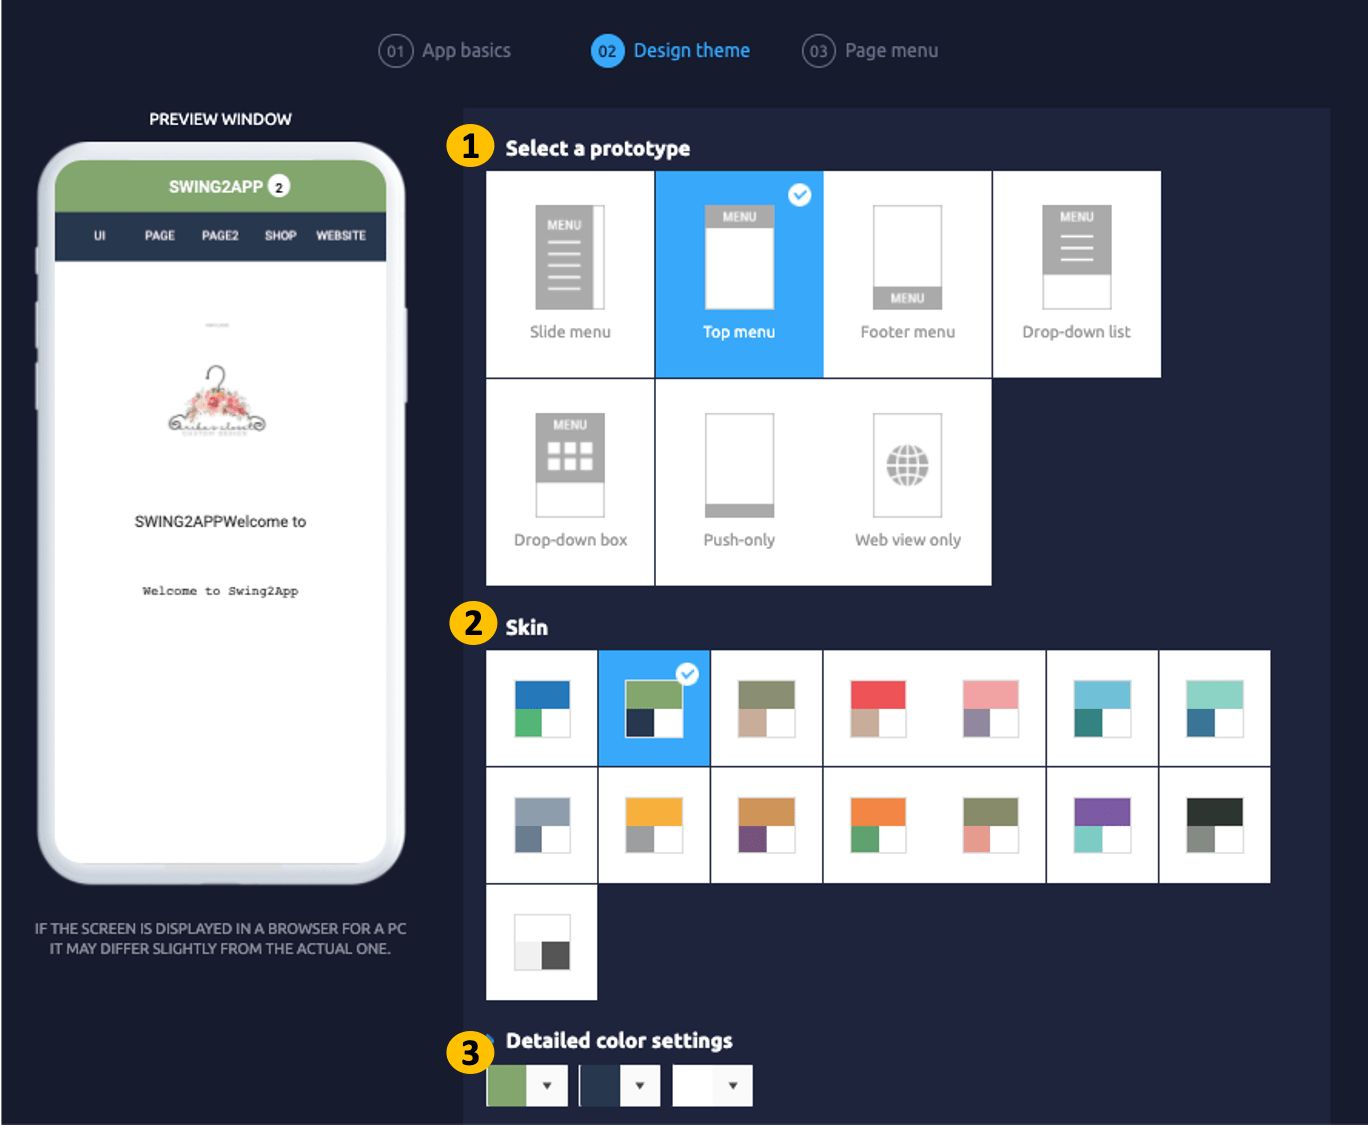
For Detailed Guide on Design Theme Visit: [Go to Detailed Tutorial]
*NOTE
1. With Detail color setting you can customize the theme color of your app
2. Once you complete app creation, you can switch between regular prototype (slide, top, footer, drop-down) but you won’t be able to switch to web view based(push and web view) prototype, you have to create a new app to use web view. So choose carefully.
STEP 3. Page Menu
Here you can organize your App’s Menu screen like Add/delete categories in Menu, Change Menu Name, Menu Icon, and Choose Menu Type.
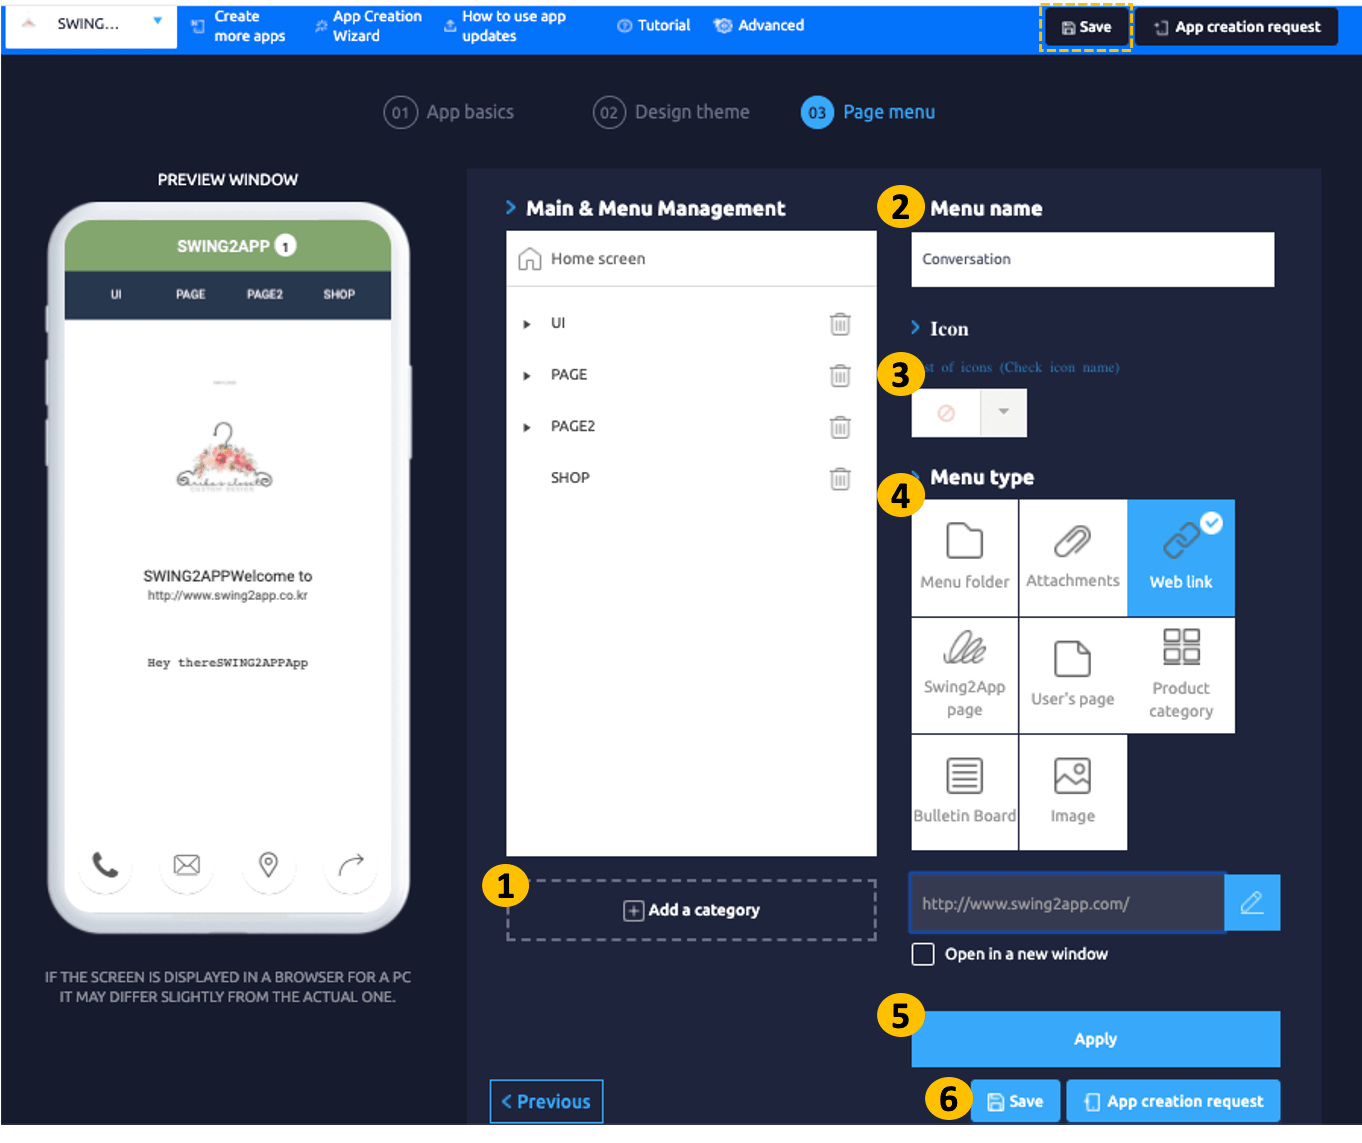
For Detailed Guide on Page Menu Visit: [Go to Detailed Tutorial]
*NOTE
1. After every new change made, click on the Apply button and then Save button to save those changes.
STEP 4. Advanced
You don’t need to work on this page.
STEP 5. App Production
You can preview your app on a virtual machine to see how it will look on a phone if satisfied click on the App creation button to complete the app production process. A pop-up window will appear, click on the Make button to finish the process.
It will redirect you to the page where you can check the progress of your app (Production history page), within 15 minutes you’ll receive your app via email (Only for Android users), meanwhile you can preview your app on the web either from pop-up or by clicking on Preview button(Available for both Android & iOS).
For Detailed Guide on App Preview and download visit: [Go to Detailed Tutorial]
STEP 6. App Installation on Mobile
Within 15 minutes you’ll receive your created app via mail, please click on Download the App button and install your app on phone(Only available for Android apps).
For Detailed Guide to install APK on Phone Visit: [Go to Detailed Guide]
*You can edit & update your app anytime.
For Detailed Guide on Updates Visit: [Go to Detailed Guide]
7. How To Delete App
- Go to Manager.
- Select My Menu.
- Click App Management.
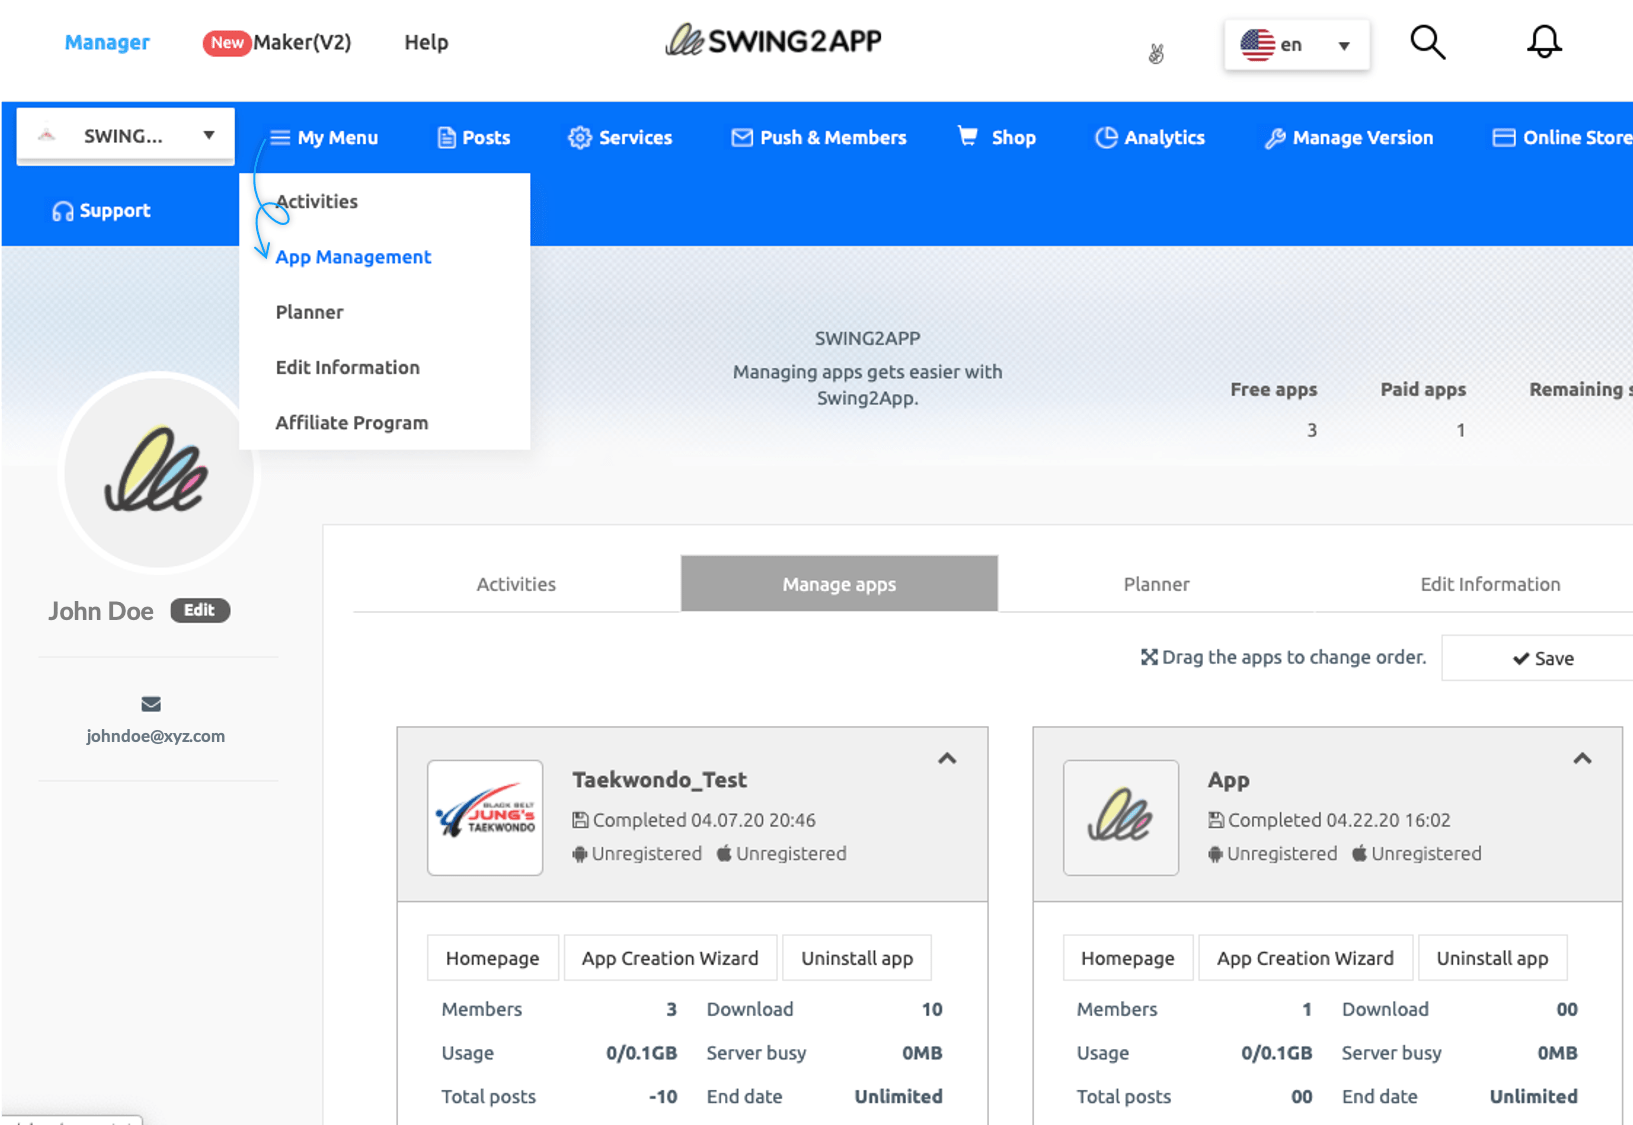
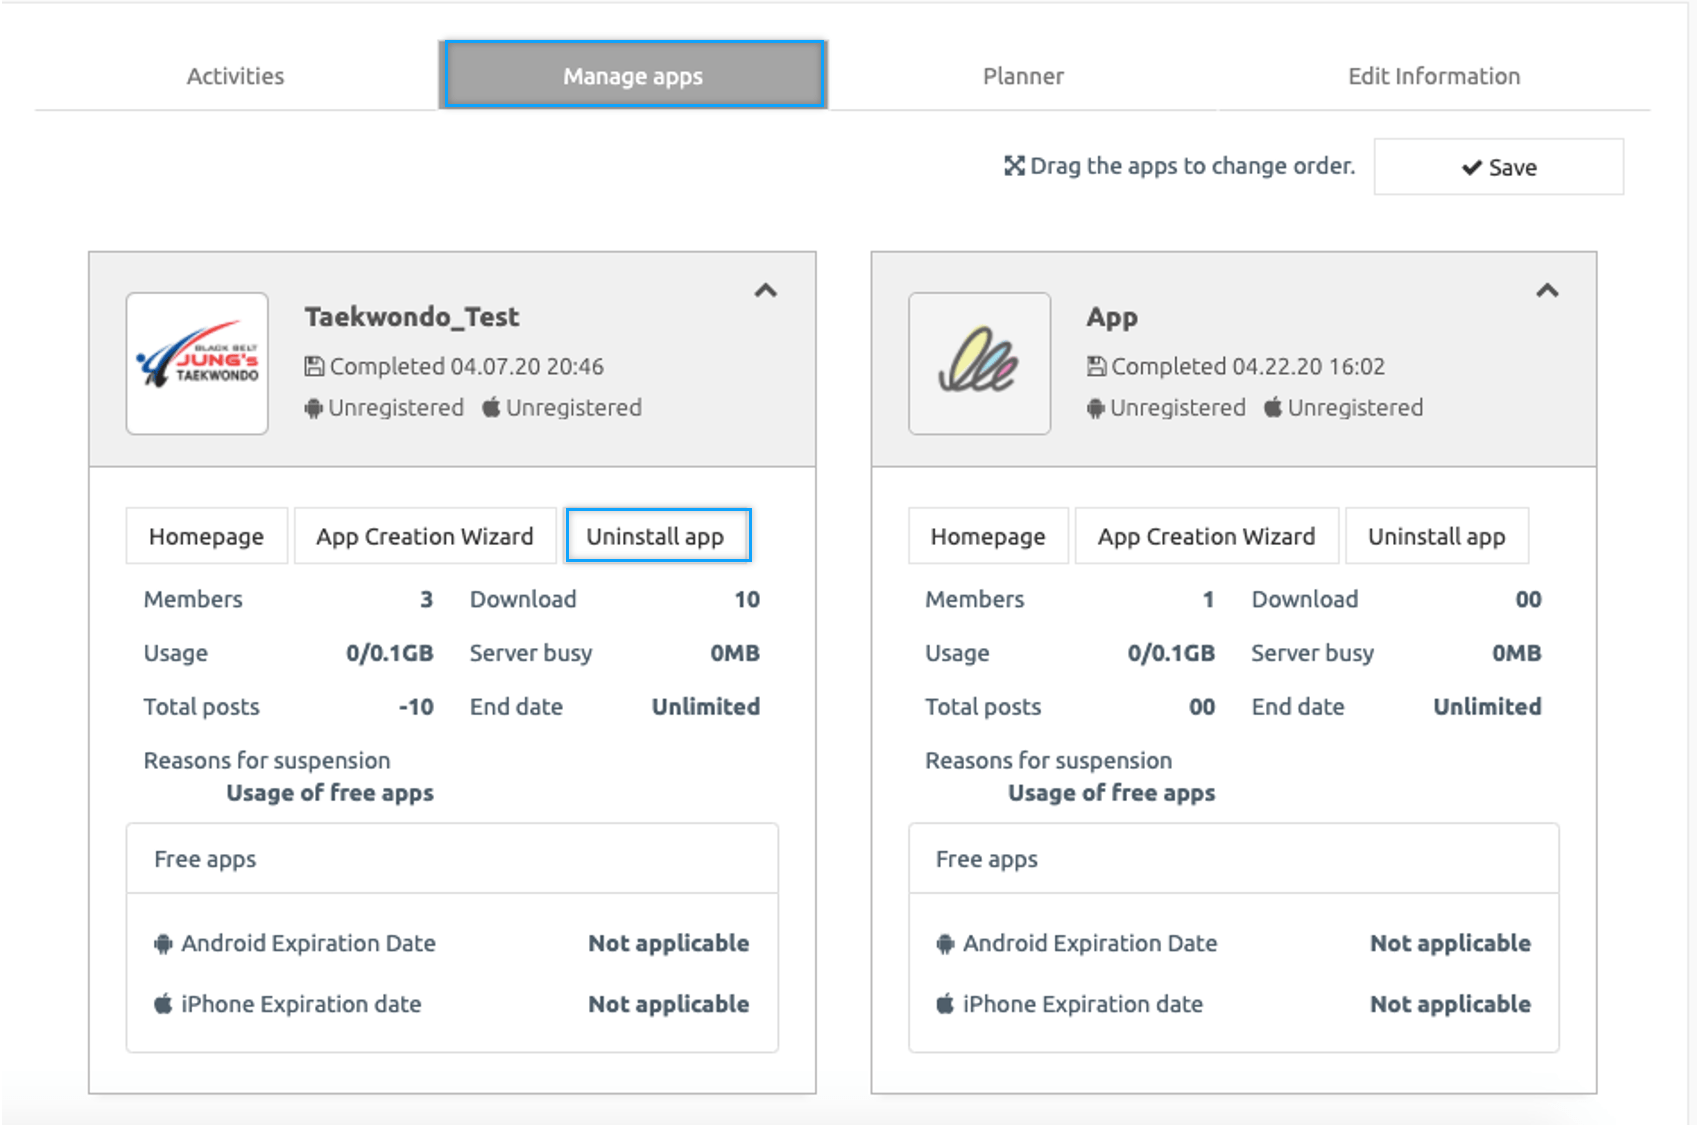
On the App Management page, you will see all the apps created by you, click on the Uninstall app button of app you want to delete, and your app will be deleted.
*NOTE
1. Once the app is deleted, you won’t be able to recover it, so delete it carefully.
2. Paid users can’t delete the app until the end of the paid period.